Coating thickness measurement
Contents (hiden)
Contents "Coating thickness measurement"
1. Layer thickness measurement definition
2. Basically: background made of metal
2.1. "FE" metals and "NFE" metals
2.2. Examples of the use of coating thickness gauges
2.2.1. Coating thickness measurement of paint
2.2.2. Coating thickness measurement in electroplating and anodising
3. What are the requirements for measuring the layer thickness?
4. Multi-layer construction
5. Further limitations in the coating thickness measurement
5.1. Roughness of layers
5.2. Hard to reach measuring points
5.3. Measuring in pipes
5.4. Environmental conditions in the coating thickness measurement
6. Technique Excursus: What is Eddy Current, what is Magnetic Inductive
7. Calibrate coating thickness gauge
8. Calibration of the Coating Thickness Gauge TOP-CHECK FE / FN (Video)
Coating thickness measurement
1. Definition
The coating thickness measurement deals with the determination of the layer thickness of coatings and coatings on surfaces. As a layer thickness is generally referred to the thickness of a coating, for. B. paint or paint, which is firmly applied to a base material. This coating can be a single coat or a multiple coat (zinc on steel).
2. Basically: background made of metal
Most important requirement: There is a metallic background. Coating thickness measurement over ceramic, glass or plastic is not possible with our devices.
2.1. "FE" metals and "NFE" metals
FE means "ferromagnetic". Fe metals are magnetizable: steel, iron, cobalt, nickel.
Nickel is a special case because coatings of chemical nickel contain phosphorus and are not ferromagnetic from 11% P-content
NFEs are then the "non-ferromagnetic" metals that are electrically conductive. For example, aluminum, copper, zinc or stainless steel.
Another special case: even stainless steel can be ferromagnetic (in the case of a ferritic alloy).
2.2. Examples of the use of coating thickness gauges
2.2.1. Coating thickness measurement of paint
Quality assurance in the painting process
• Compliance with minimum paint thickness
• Optimization of material usage
Car experts
• Is the paint original or after repainting?
2.2.2. Coating thickness measurement in electroplating and anodising
Quality assurance with galvanic coating
• Galvanizing, chrome plating on steel
• Lacquered galvanizing, determination of both layer thicknesses (zinc and lacquer)
• Copper coated steel gravure rolls
Quality assurance in anodizing aluminum coatings
Coming soon...
Quality assurance for rubber coatings of metal
Coming soon...
3. What are the requirements for measuring the layer thickness?
The layer must be dry and cured.
The coating must not fall into the same group (FE, NFE) as the substrate.
Strong magnetic base material can disturb the probe so that it is internally damaged.
Thin layers of less than 3 μm can not be measured stably.
The base material must not be thinner than 0.5 mm.
For small contact surfaces of less than radius 2mm (FE) or 6mm (NFE), the probe can not be mounted.
With a domed base under an outer radius / convex of 2mm (FE) or 6mm (NFE) as well as under an inner radius / concave of 8mm (FE) or 38mm (NFE) is also not attachable.
4. Multi-layer construction
In multilayer constructions, two layers can be measured separately if
a) the substrate is ferromagnetic,
b) the first layer is metallic-non-ferromagnetic above the substrate, and
c) the topmost layer is non-conductive, for example paint or rubber.
5. Other restrictions
5.1. Roughness of layers
For a rough layer it is necessary to measure in several places and to look at the result statistically (minimum, maximum, mean value). MEGA-CHECK Master can take over this task. They move the probe over the surface and automatically determine statistical values.
5.2. Hard to reach measuring points
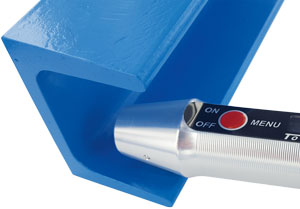
The swiveling probes of TOP-CHECK or MEGA-CHECK allow to measure at an angle of up to 90 °.
5.3 Measuring in pipes
For tubes or narrow openings there are special probes such as PF-1T, PF-2T or PF-3T.
The pipe itself must not be too narrow, the measurement is disturbed in narrow pipes by reflection.
5.4. Environmental conditions in the coating thickness measurement
Not at temperatures below 0 ° C due to electronics
Not at temperatures above 50 ° C, the probe could be damaged
Do not measure with eddy current method under water, as water itself is conductive
6. Technique excursus: what is eddy current, what is magnetic inductive
List Magnetic devices use two of the non-destructive testing (NDT) techniques, the ISO 2178 magnetic induction process and the ISO 2360 eddy current process. The magnetic induction process is used when the substrate itself is magnetizable (steel or iron). , The eddy current method comes into play when the substrate is at least electrically conductive (other metals such as aluminum).
7. Calibrate coating thickness gauge
List Magnetic devices are factory calibrated and do not necessarily need to be calibrated by the user. An exception is when measuring on curved surfaces or on different base materials. Here, according to ISO 2178, a two-point calibration should be performed on an uncoated same object.
8. Calibration of the coating thickness gauge TOP-CHECK FE / FN


